To access the user management section of the Radon Management Cloud, navigate to Settings \ User Management after logging into the Radon Management Cloud. This will bring you to the Manage Users page where all the users of your company will be listed in a table which displays their email address, user type and status. There is an Actions menu to the right of each user listed in the table with the actions Edit or Deactivate/Activate. Select Edit to go to the Edit User screen for that user where you can modify the user’s profile information. Select Deactivate/Activate to turn access for that user’s login on and off. Users of the system are never deleted, only deactivated and can be re-activated at any time.
User Types
There are two user types available for your company with the following permissions. There is no limit to the number of users you can create within your company.
Company Admin
- Manage Report Templates for Company
- Manage Email Templates for Company
- Manage Users for Company
- Start/Stop Tests
- View all Tests for Company
Company Tester
- Start/Stop Tests
- View all Tests for Company
Creating Users
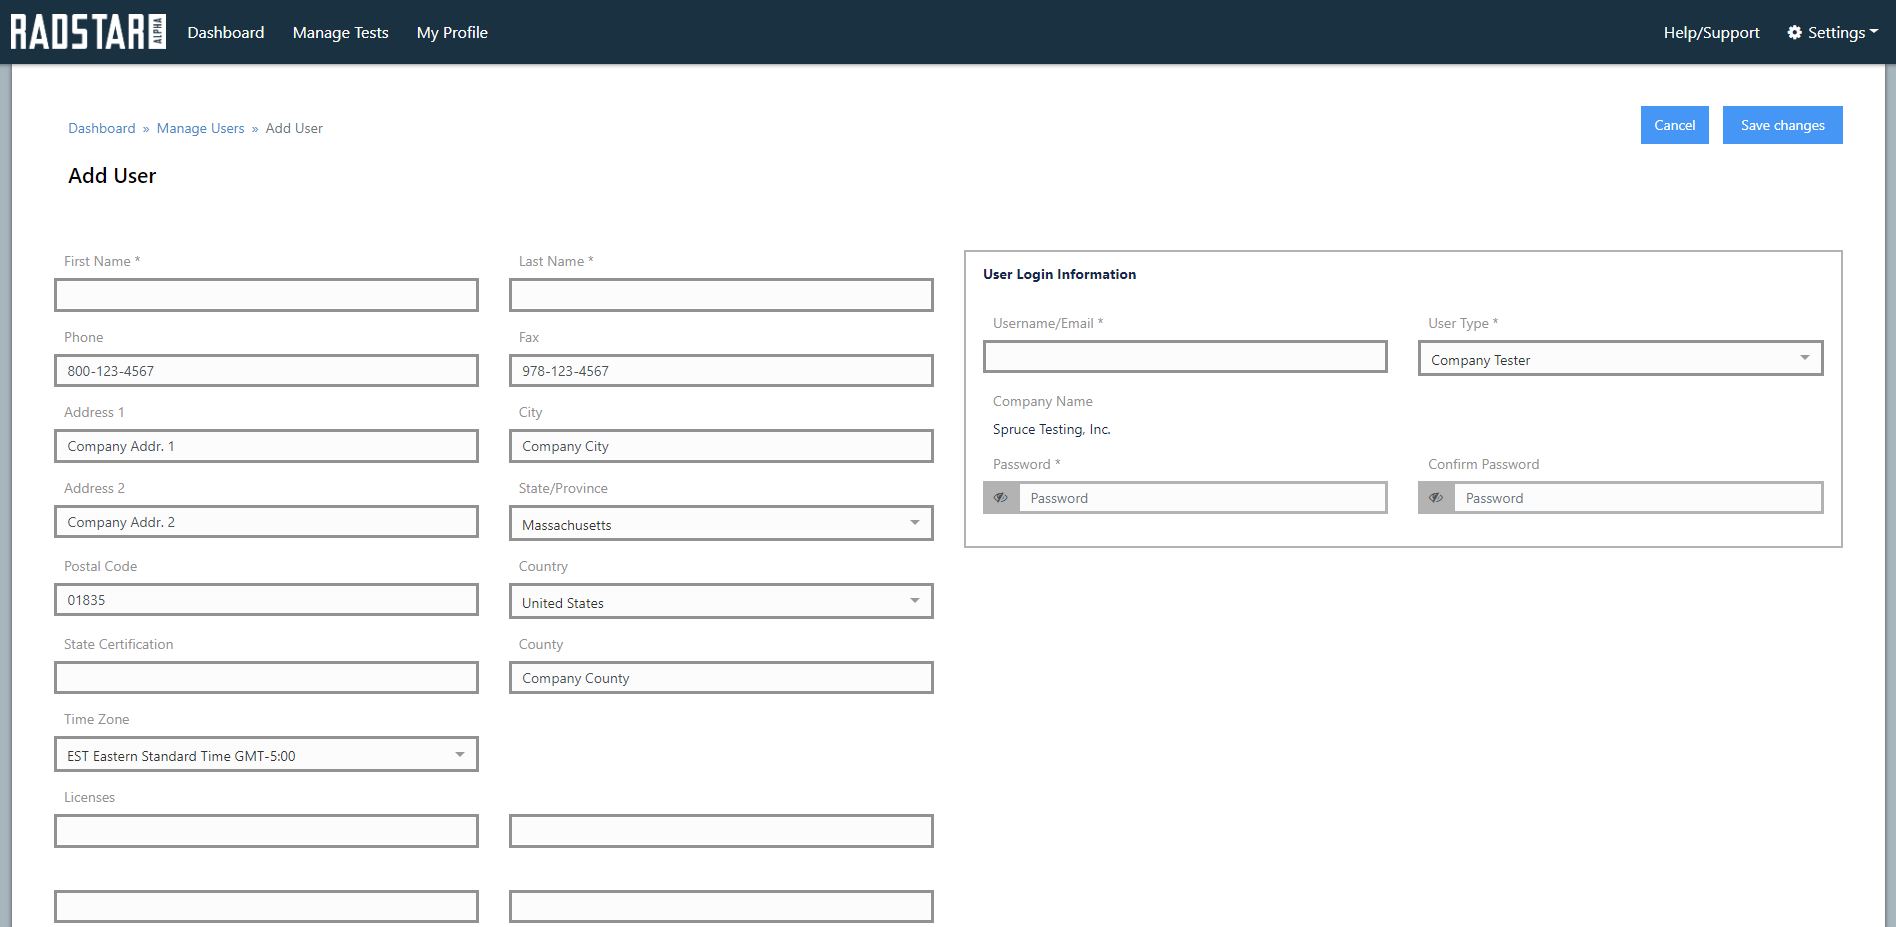
From the Manage Users screen, select Add User to bring up the Add User form. You will notice that the address will automatically populate with the address from the Company profile. At this time, you can modify this address for that specific user if needed. Enter the users First Name, Last Name, Certifications and License Numbers. On the right side of the screen, you will see the User Login Information. Enter the user’s email address (which will act as their username for login to the Radon Management Cloud), select the User Type from the dropdown and create a password for that user. Upon saving, an email containing the username and password you created will be generated and sent to the new user. The user has access to Radon Management Cloud immediately after saving.